Why use a flash?
There are a number of situations that require additional front lighting in order to bring out the best of a subject, or simply to be able to see them at all. There are also creative situations to consider using a flash but I won’t be covering those here.
The two most common scenarios I’ll be covering are photographing people (or things) with a bright light behind them. This could be a person at sunset (with the sun behind) or could also be a statue in front of a bright sky. Secondly, when indoors with only average room lighting, it is almost inevitable that flash will be required.
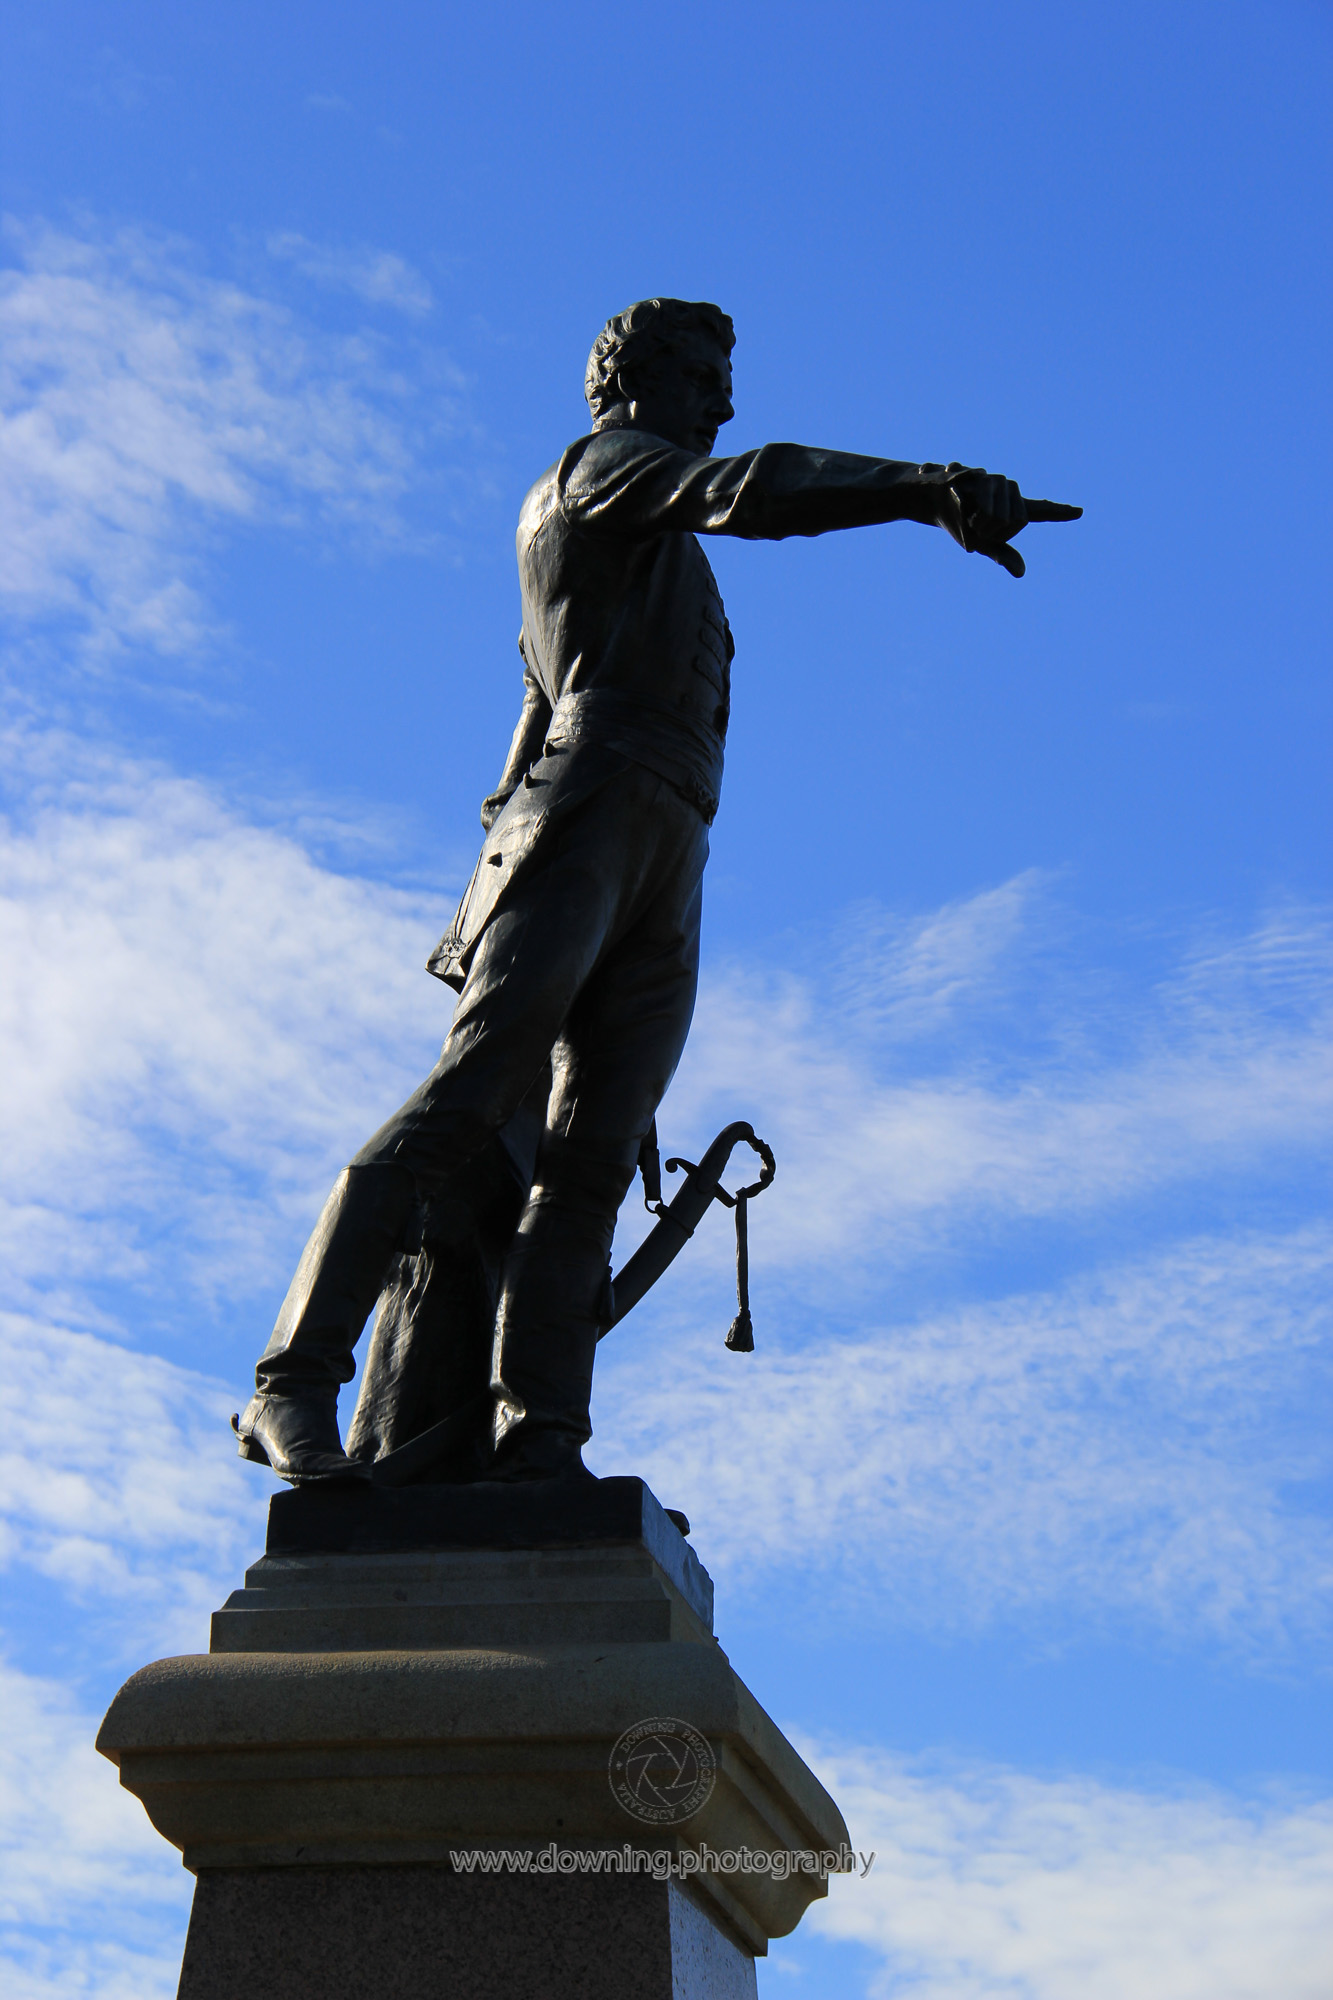
Scenario 1: Background is brighter than the object.
Have a look at the two examples: they were taken almost at the same time, but in the second I chose to use a small amount of flash in order to see some more detail of the sculpture.

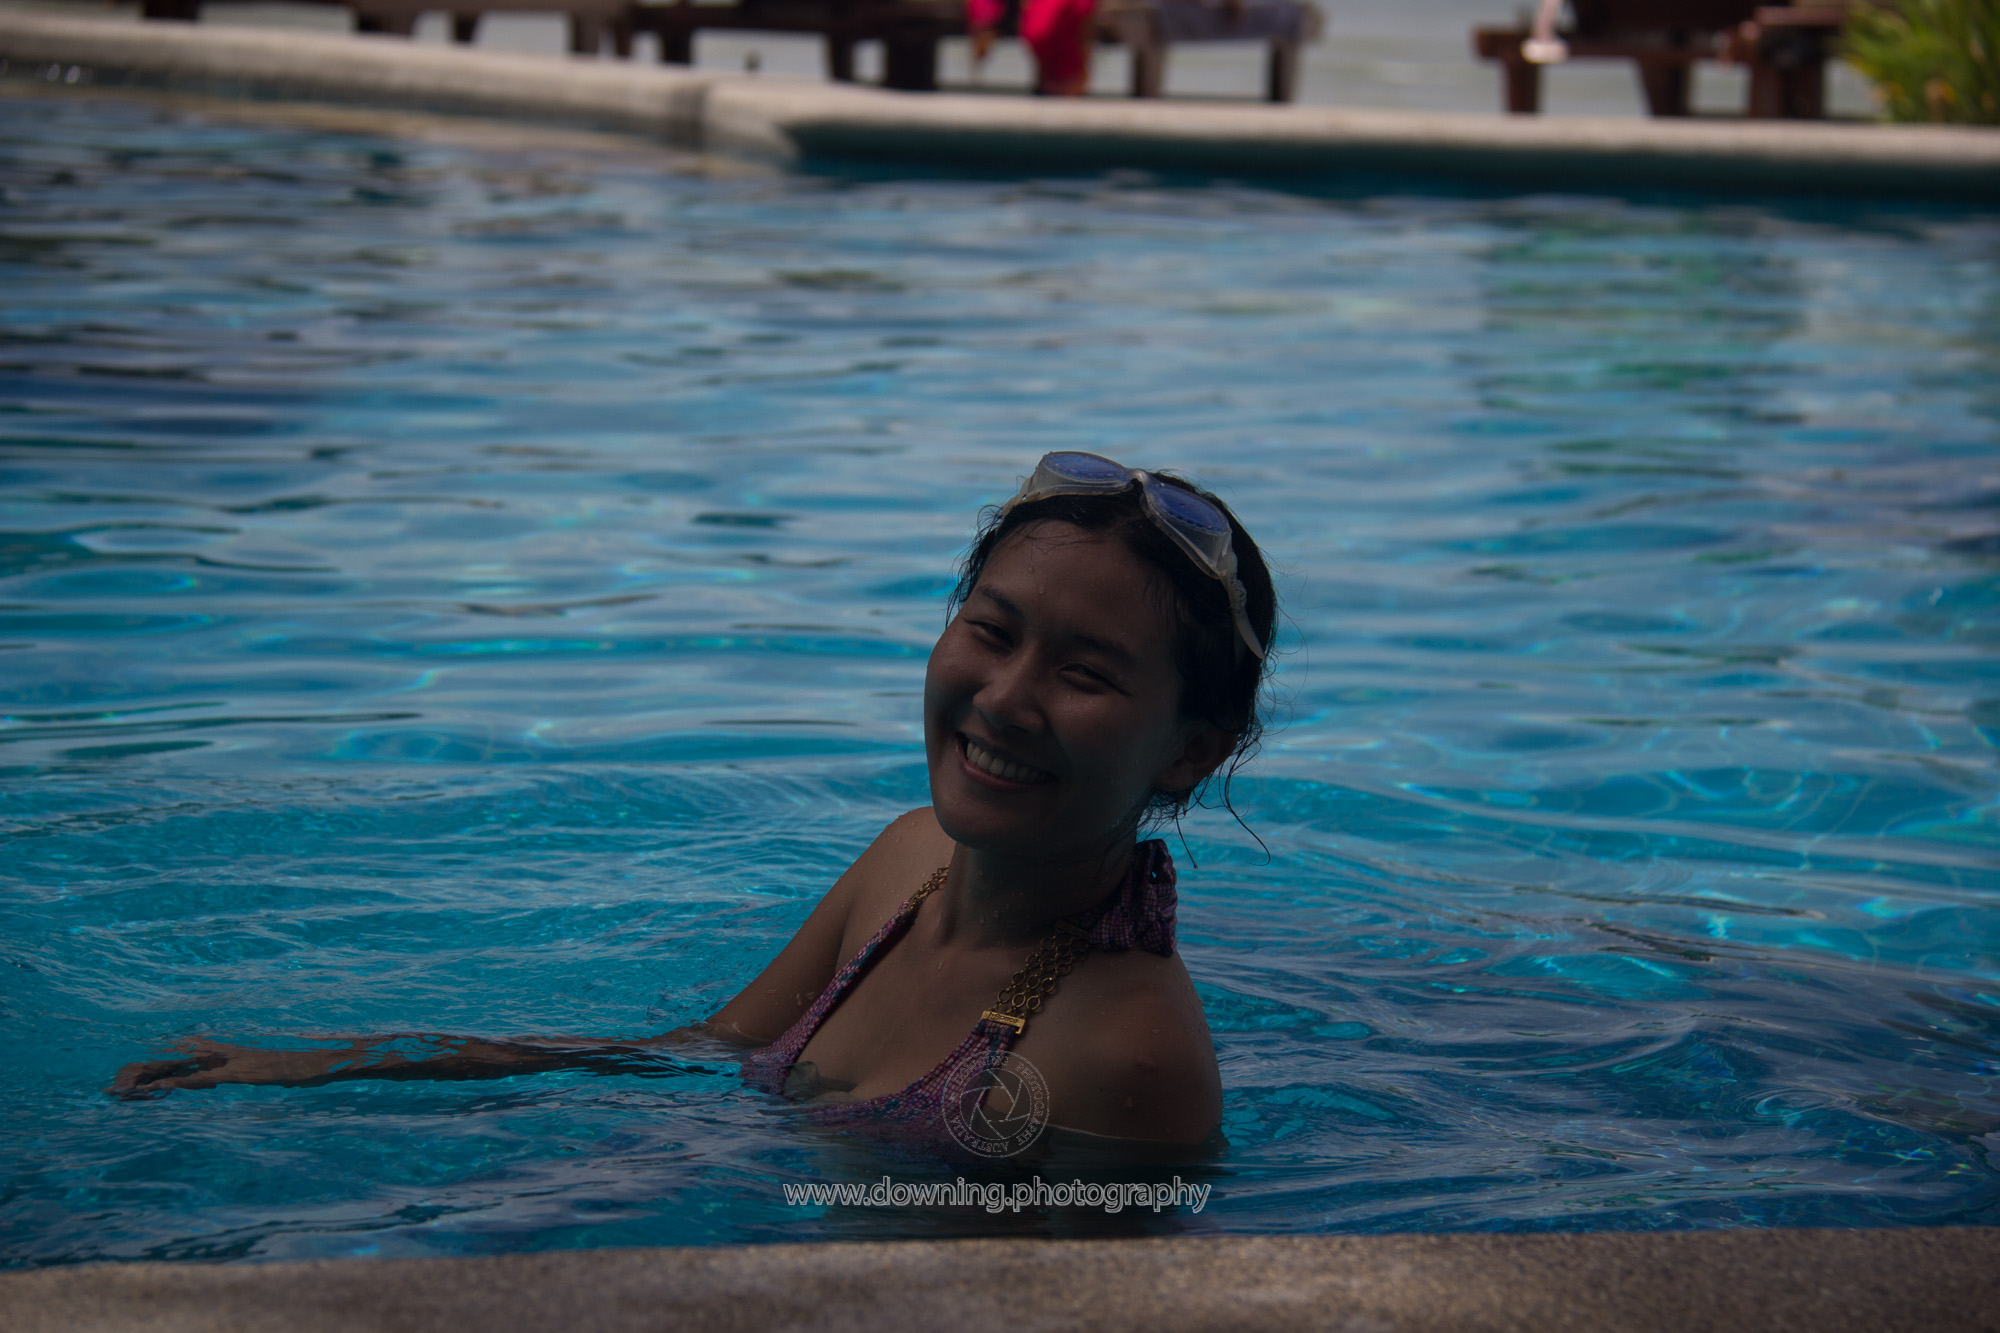
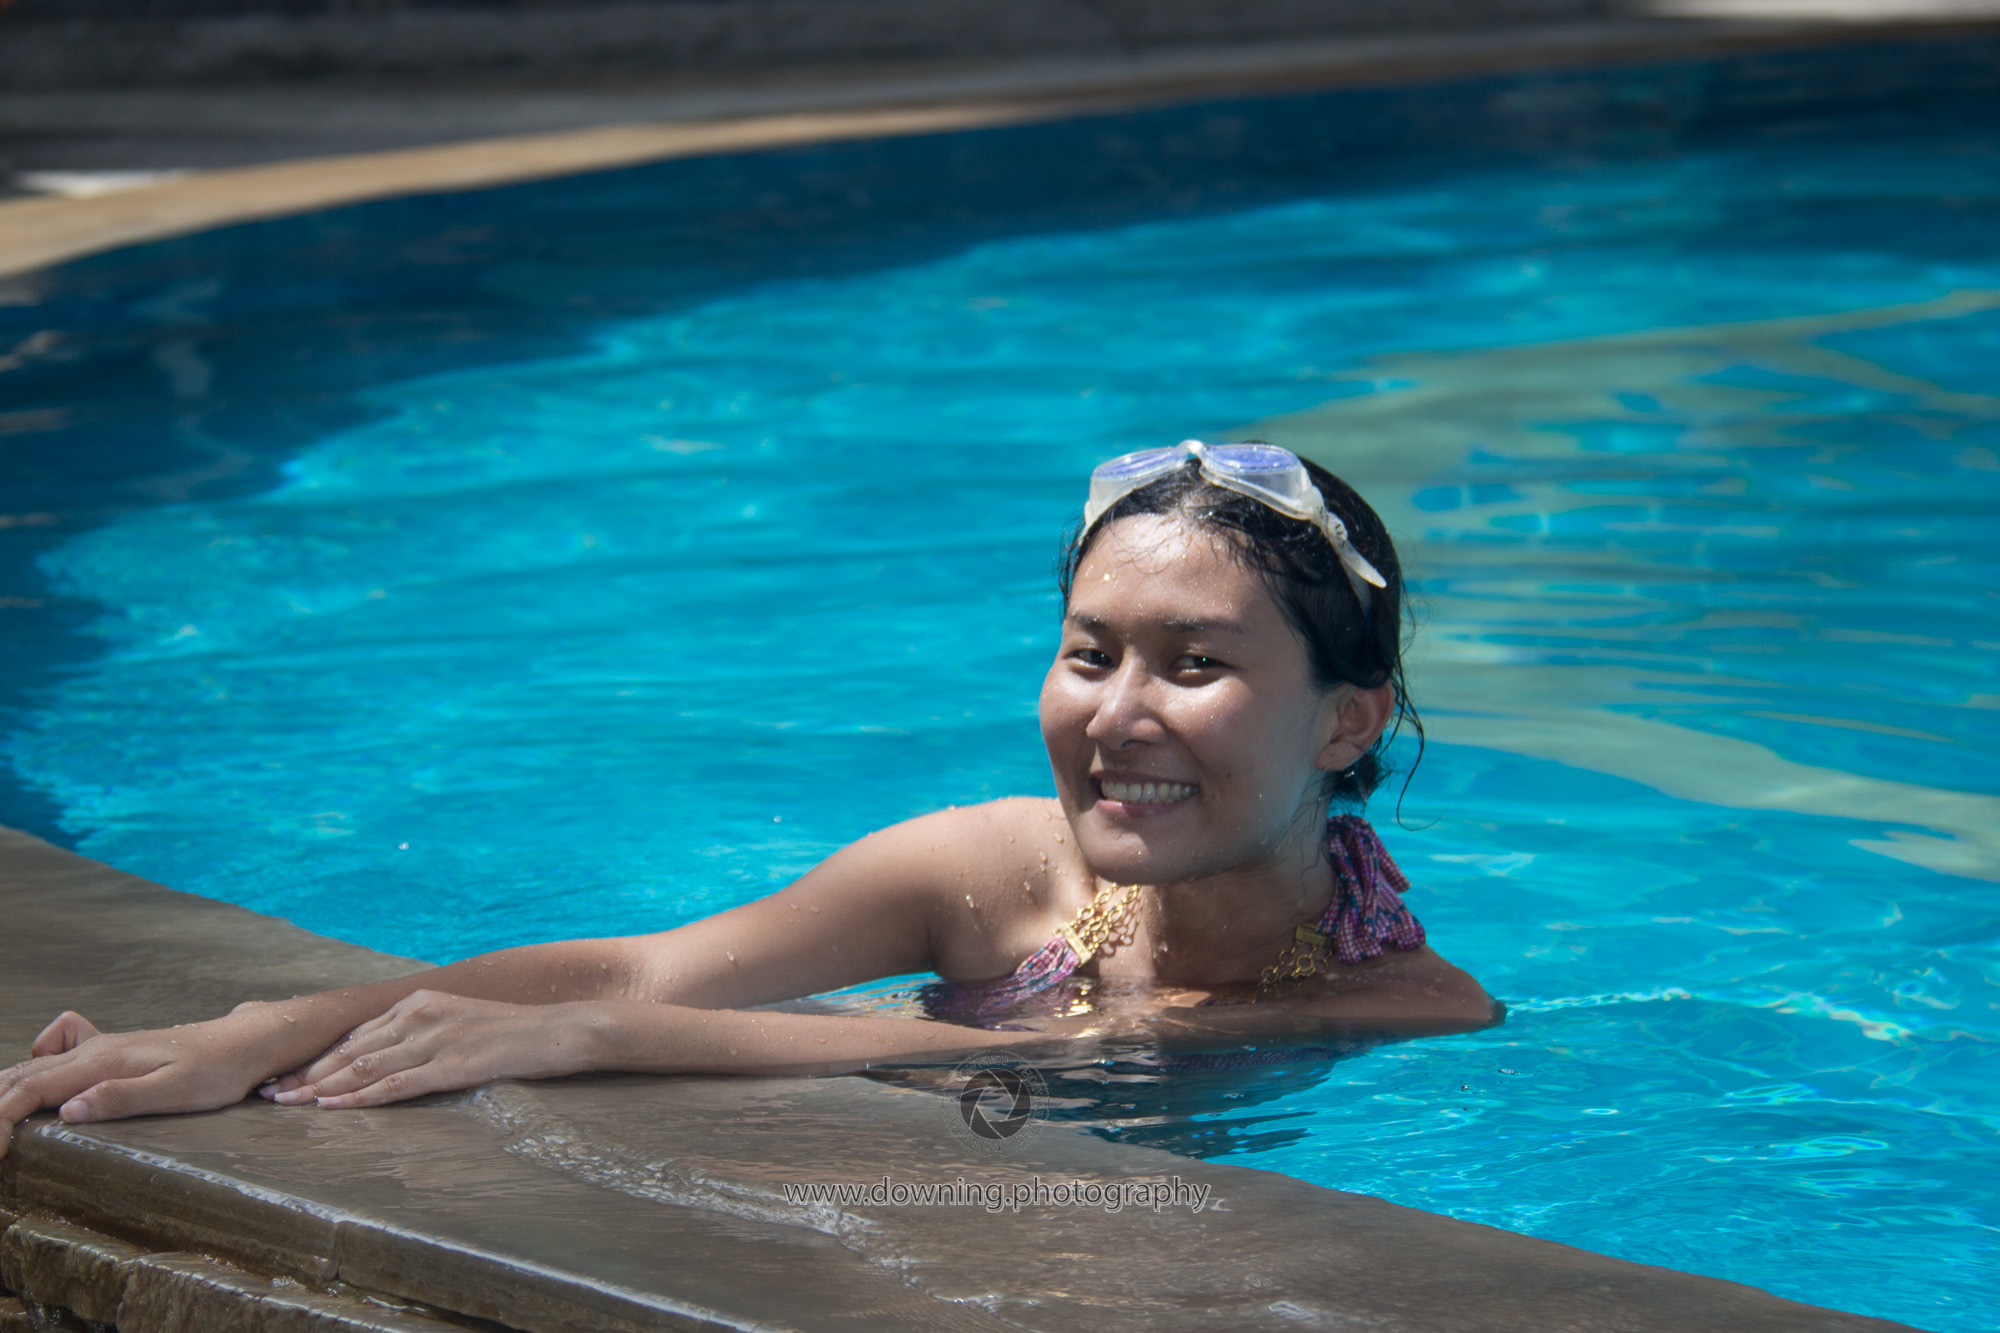
Scenario 2: Overall scene is dark and low contrast between subject and background.
In the example below, the natural lighting was not quite up to it, so apart from increasing the overall exposure I also introduced some flash.
What settings?
Most built-in flashes use ‘exposure through the lens’ (ETTL) mode so that the camera’s light meter works out the intensity of the flash required and automatically sets the shutter speed (usually to 1/60th) and aperture (usually wide open). This will provide a good all-over result. Some cameras have flash exposure adjustment as well as camera exposure adjustment (often referred to as EV).
With an external flash unit you have some extra options. Depending on the situation and effect you are after, why not try switching to manual mode. In this mode the camera will know you have a flash, but has no idea how bright it will be. By experimenting with different combinations of flash intensity and ISO, you can achieve differing effects. Playing with shutter speed and aperture requires expert knowledge of flash duration.
As a general rule, increasing the ISO will increase the overall exposure of the picture and cause more illumination of the background and for a greater distance. Increasing or decreasing the flash exposure will change the intensity of light mainly on the object but will also affect the background to a smaller extent. When adjusting flash intensity, be aware of bright reflections on the face which indicate that the intensity is too high.
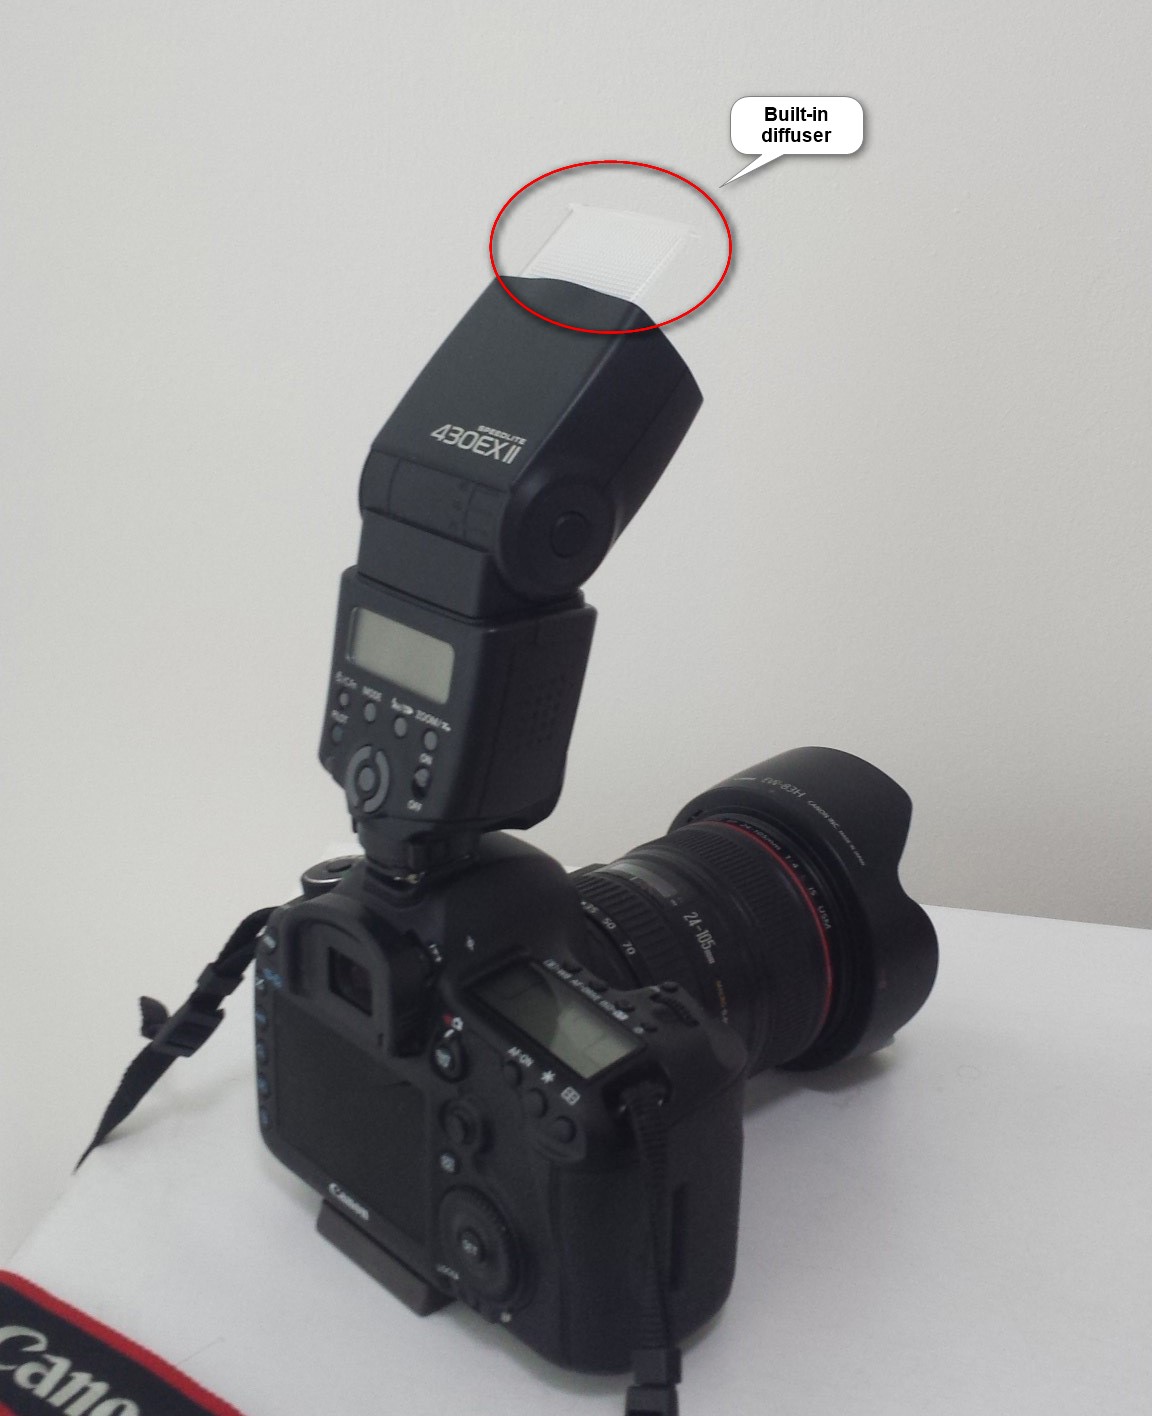
‘Bouncing’ the flash
This is only an option on external flash units. It enables the flash to be reflected off a surface above the subject and results in a softer exposure with more natural looking facial shadows. If you like photographing people indoors then this is a must-have. Obviously you must have something to bounce off, and you will need to play with EV to get the desired result. The intensity of the flash reaching the subject will depend on the reflective surface (white ceiling?) and the distance you are from the subject.
Using a bounce reduces the ‘reach’ of the flash overall, and the reach will drop of quite noticeably as you move further away from your subject. One technique I use to improve the reach is to use a reflector (or in this case the built-in diffuser) to redirect some of the flash output more directly at the subject.
If you have any comments on this article or suggestions for future articles, then please use the Contact page to send a request to the author.
Tim Downing, 28 April 2015.