When reading digital photography literature I often come across the buzzword “workflow”. In an attempt to demystify this often mentioned but poorly described term, I offer the following definition and article.
“workflow” (n). The sequence of industrial, administrative, or other processes through which a piece of work passes from initiation to completion. – Oxford Dictionary
I like this definition because it a relatively short, and talks about taking something from start to finish. In our case this is a digital photograph.
What is a photo-editing workflow?
So what does the literature mean by “workflow”? Well from what I can glean they are usually referring to a number of steps using one or more software applications (and the tools and capabilities they contain) to edit an image as taken directly from a camera, to its finished state.
It’s worth mentioning at this point that what is meant by ‘finished state’ will vary from photographer to photographer depending on their style, skill, and requirement. Finished images will usually fall neatly within one of two categories: photo-realism where the goal is to maintain (and arguably enhance) the visual integrity of the image. Examples of this would be the removal of grain or other artefacts introduced by the camera, or colour temperature correction to perhaps compensate for artificial lighting conditions.
The second category is photo-illustration, where the goal of the photographer (dare I say artist at this point) is to alter the image using artistic tools to create an interpretation of the photographer’s vision. This may include removing unsightly objects from a photo, healing blemishes on the skin of models, or adding lighting or colour effects to enhance the photo in some way.
Depending on your goal, your workflow may include different applications, steps, and techniques. The main thing here is that to be a workflow it must be consistently repeatable from one image to the next.
My Adobe Lightroom workflow.
I am going to describe a typical workflow that I follow to take an image from my camera to one which I can publish usually as photo-realism, but also tending at times toward illustration. Read on and you’ll understand why.
Firstly, I use Adobe LightRoom 5.7 to catalogue and organise all of my photos. Within my catalogue I have various collections to which photos belong including specific projects or categories of work.
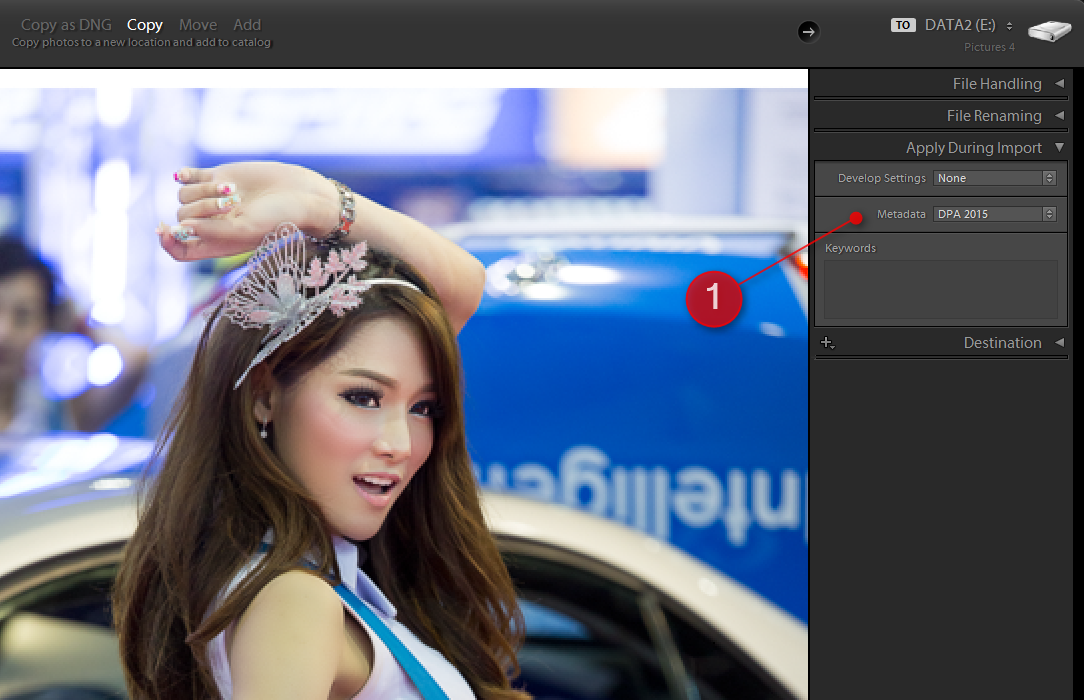
Step 1 – import and metadata.
During the import, I will automatically (via a template) add metadata to populate the copyright and author XML fields.
Following the import I will use a ‘flag’ to select only those photos that I want to transfer to the final collection (I leave the original library intact).
I then use a filtered view to display only flagged images in the library and create a new collection containing only these images — these are the ones that I will take to the next phase.
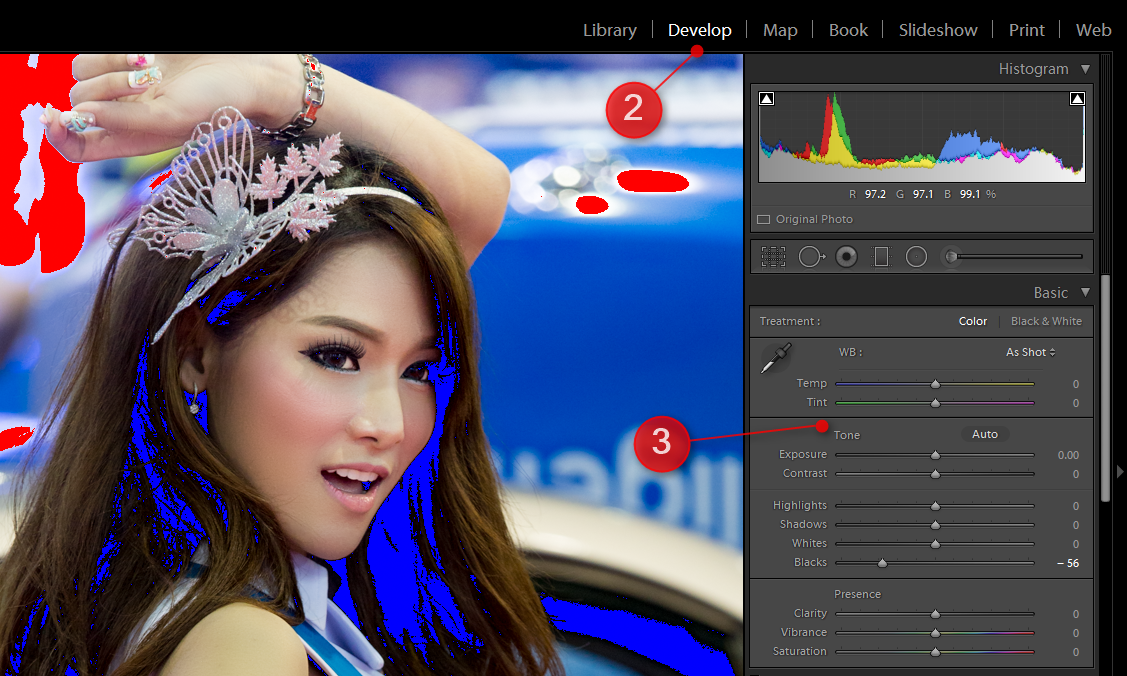
Step 2 – grading and clipping check.
In this step I want to grade each photo to ensure that the colour temperature, overall exposure and contrast is consistent across those photos which were taken at the same time and place. This means fairly quickly opening each image in the ‘develop’ (2) module and tinkering with the white-balance, exposure, and contrast sliders (3). As you adjust, keep an eye on the histogram and the clipping colours on your image. In this example they are the bright red and blue areas.
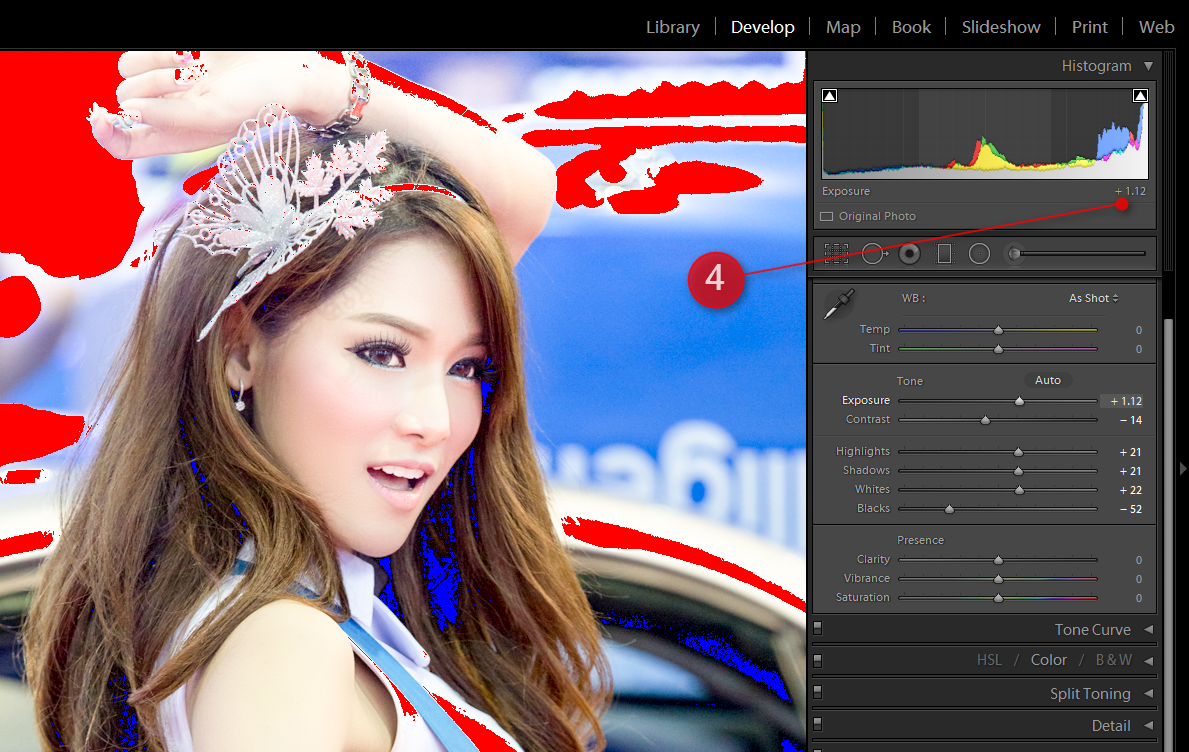
Sometimes I will copy and paste these settings between images, or turn on ‘sync’ so that my changes are applied to a number of like images at the same time. When adjusting exposure, I want to make sure that absolute blacks and whites are not ‘clipped’ or else fine detail will be lost. I recall vividly Steve Fraser’s description of ‘climbing the wall’. As you lighten the image, watch the histogram and you will see the bars bunch up and get quite tall at the white end of the spectrum (4). For landscape shots with lots of pale sky this is quite normal, but beware that you don’t over do it and ‘climb the wall’. In this example I have deliberately boosted the exposure to create this problem.
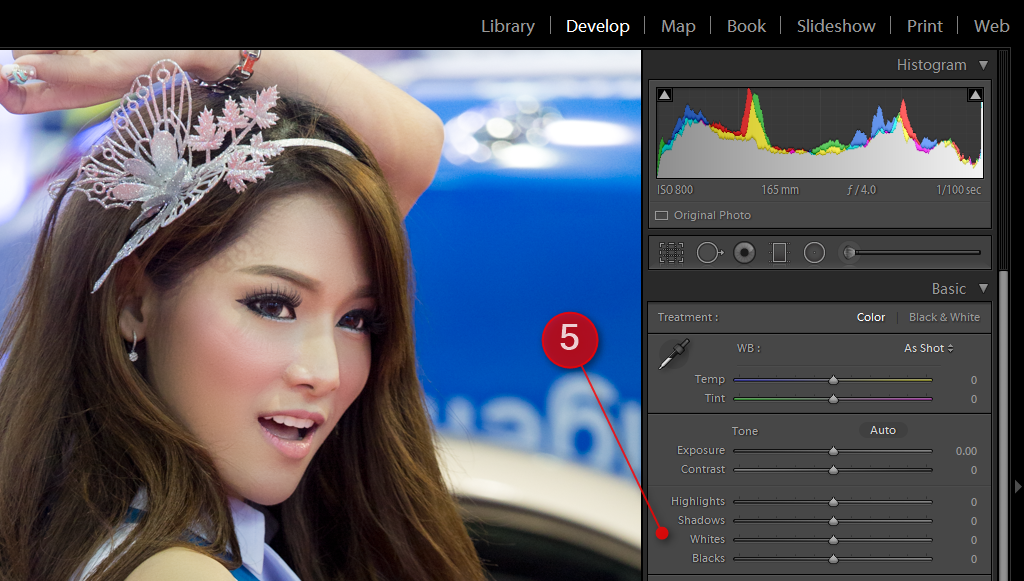
Step 3 – highlight and shadow adjustment.
After grading I again look at each image, but this time more critically to ensure that I have a balanced amount of shadow, highlight, dark and light. For this I use the next section of sliders in the develop module (5).
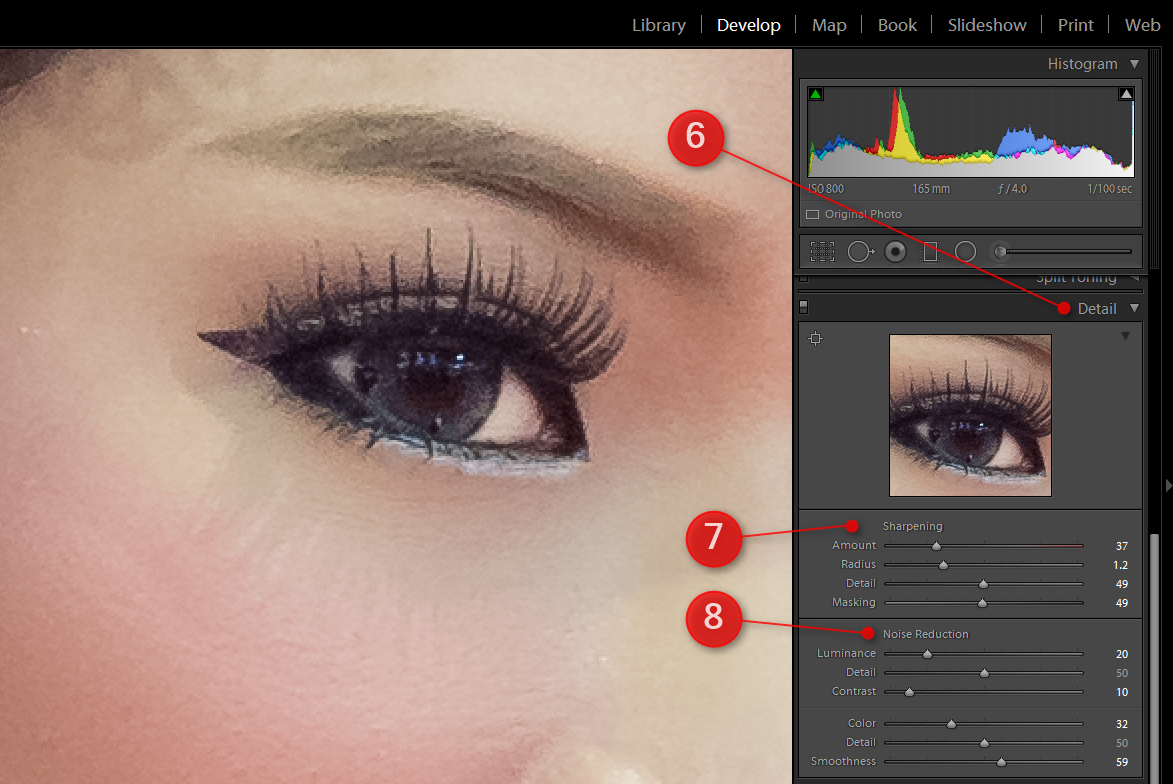
Step 4 – sharpening and noise reduction.
Finally I’ll visit the ‘detail’ section of the develop module (6) and consider some edge sharpening (7) and noise reduction (8) if appropriate (again, be very careful not to overdo it).
Step 5 – exporting the completed image.
OK, so step 4 wasn’t the last step, but this one is so short and automated that it is hardly worth covering. After the developing, I use a preset export setting to save them for Facebook and/or website. This will include settings for resolution, watermark, file naming, and save location.
So there you have the most basic Lightroom-only workflow for photo-realism. If I want to take it further into the creative realm, then I consider using the tinting controls, split toning, and even the colour replacement capabilities of the develop module which would be step 4a.
Detailed fixups.
For detailed fix-ups and particularly where masking is required, I will use ctrl-E (open in Photoshop) to take a copy of the image with LightRoom adjustments and do further work with adjustment layers, dodging, burning, blending, and even composing multiple images into one. This would be step 4b and can easily double the amount of time spent working on a single image. For this reason, I will usually decide during the detailed Lightroom develop (step 4) whether my requirements warrant this amount of work. If I do decide to work with Photoshop, I will keep certain Lightroom adjustments to a minimum, as they are better done in Photoshop in order not to lose detail. Examples are the sharpening and noise-reduction which are actually quite destructive adjustments if you are going to further process the image.
When Lightroom is used in this systematic approach, a lot can be achieved without reverting to Photoshop and the overheads (time and storage) that this entails.
I hope that you have found this article insightful and perhaps inspired to think about what your workflow looks like. Can you streamline your image handling and editing for faster and/or more consistent results? If you have any comments on this article or suggestions for future articles, then please use the Contact page to send a request to the author.
Tim Downing, 8 May 2015.